Test
Once your Anvil Application is configured, use the guidelines below to test it.
Make sure that the following prerequisites are met before inititing your test operations:
- You have a vendor account on the CloudBlue Connect platform
- Your Connect distributor account includes a configured marketplace
- Your
Anvil trial accountis registered
Create a t-shirt product
Sign into your vendor account and create a product that will be used for the following tests.
Info
In case you are not familiar with the Products module on Connect, use the documentation that is provided on the Connect
Community Portal.
- Sign into your
vendoraccount and create a t-shirt product via the Connect UI. - Go to the Product Parameters tab and remove the default parameters.
- Add a new
choiceproduct parameter, assign theorderingphase and select thesubscriptionscope. - Add the following choices to your list:
- label
XSvaluexs - label
Svalues - label
Mvaluem - label
Lvaluel - label
XLvaluexl
- label
- Set the parameter ID to
size. - Switch to the
Versionstab and create a public version of your t-shirt product.
Tip
Make sure to copy your product ID since it is required for the following operations.
Create a listing request
Use your vendor account and the Listing module to list your created product to your marketplace:
Info
If you are not familiar with the Listings module on Connect, refer to the corresponding documentation on
Community Portal.
- Proceed to the
Listingsmodule and click theManage Listingbutton. - Follow the
Manage Listingwizard and select your configured marketplace.
Tip
Copy your marketplace ID since it is required for the following operations.
Accept your request
Sign into your distributor account and use the Listing module to start processing your listing request:
- Navigate to the
Requeststab of the Listings module - Access your created listing request with your t-shirt product.
- Click on the
Mark as deployingbutton at the top-right corner of the interface. - Finalize your product listing operations by using the
Mark as completedbutton
Create a hub connection
Use your distributor account and the Products module to create a new connection with your hub:
Info
In case more detailed instructions on how to create a hub connection are required, refer to this article.
- Access your t-shirt product via the
Productsmodule on Connect. - Switch to the
Connectionstab and click theCreate Connectionbutton.
Tip
Copy your connection ID since it is necessary for the following procedures.
Create Anvil Client Application
Once your Anvil trail account is registered, you can create a new Anvil Client Application. Use the following link to quickly setup your application: Download a pre-defined Anvil Application.
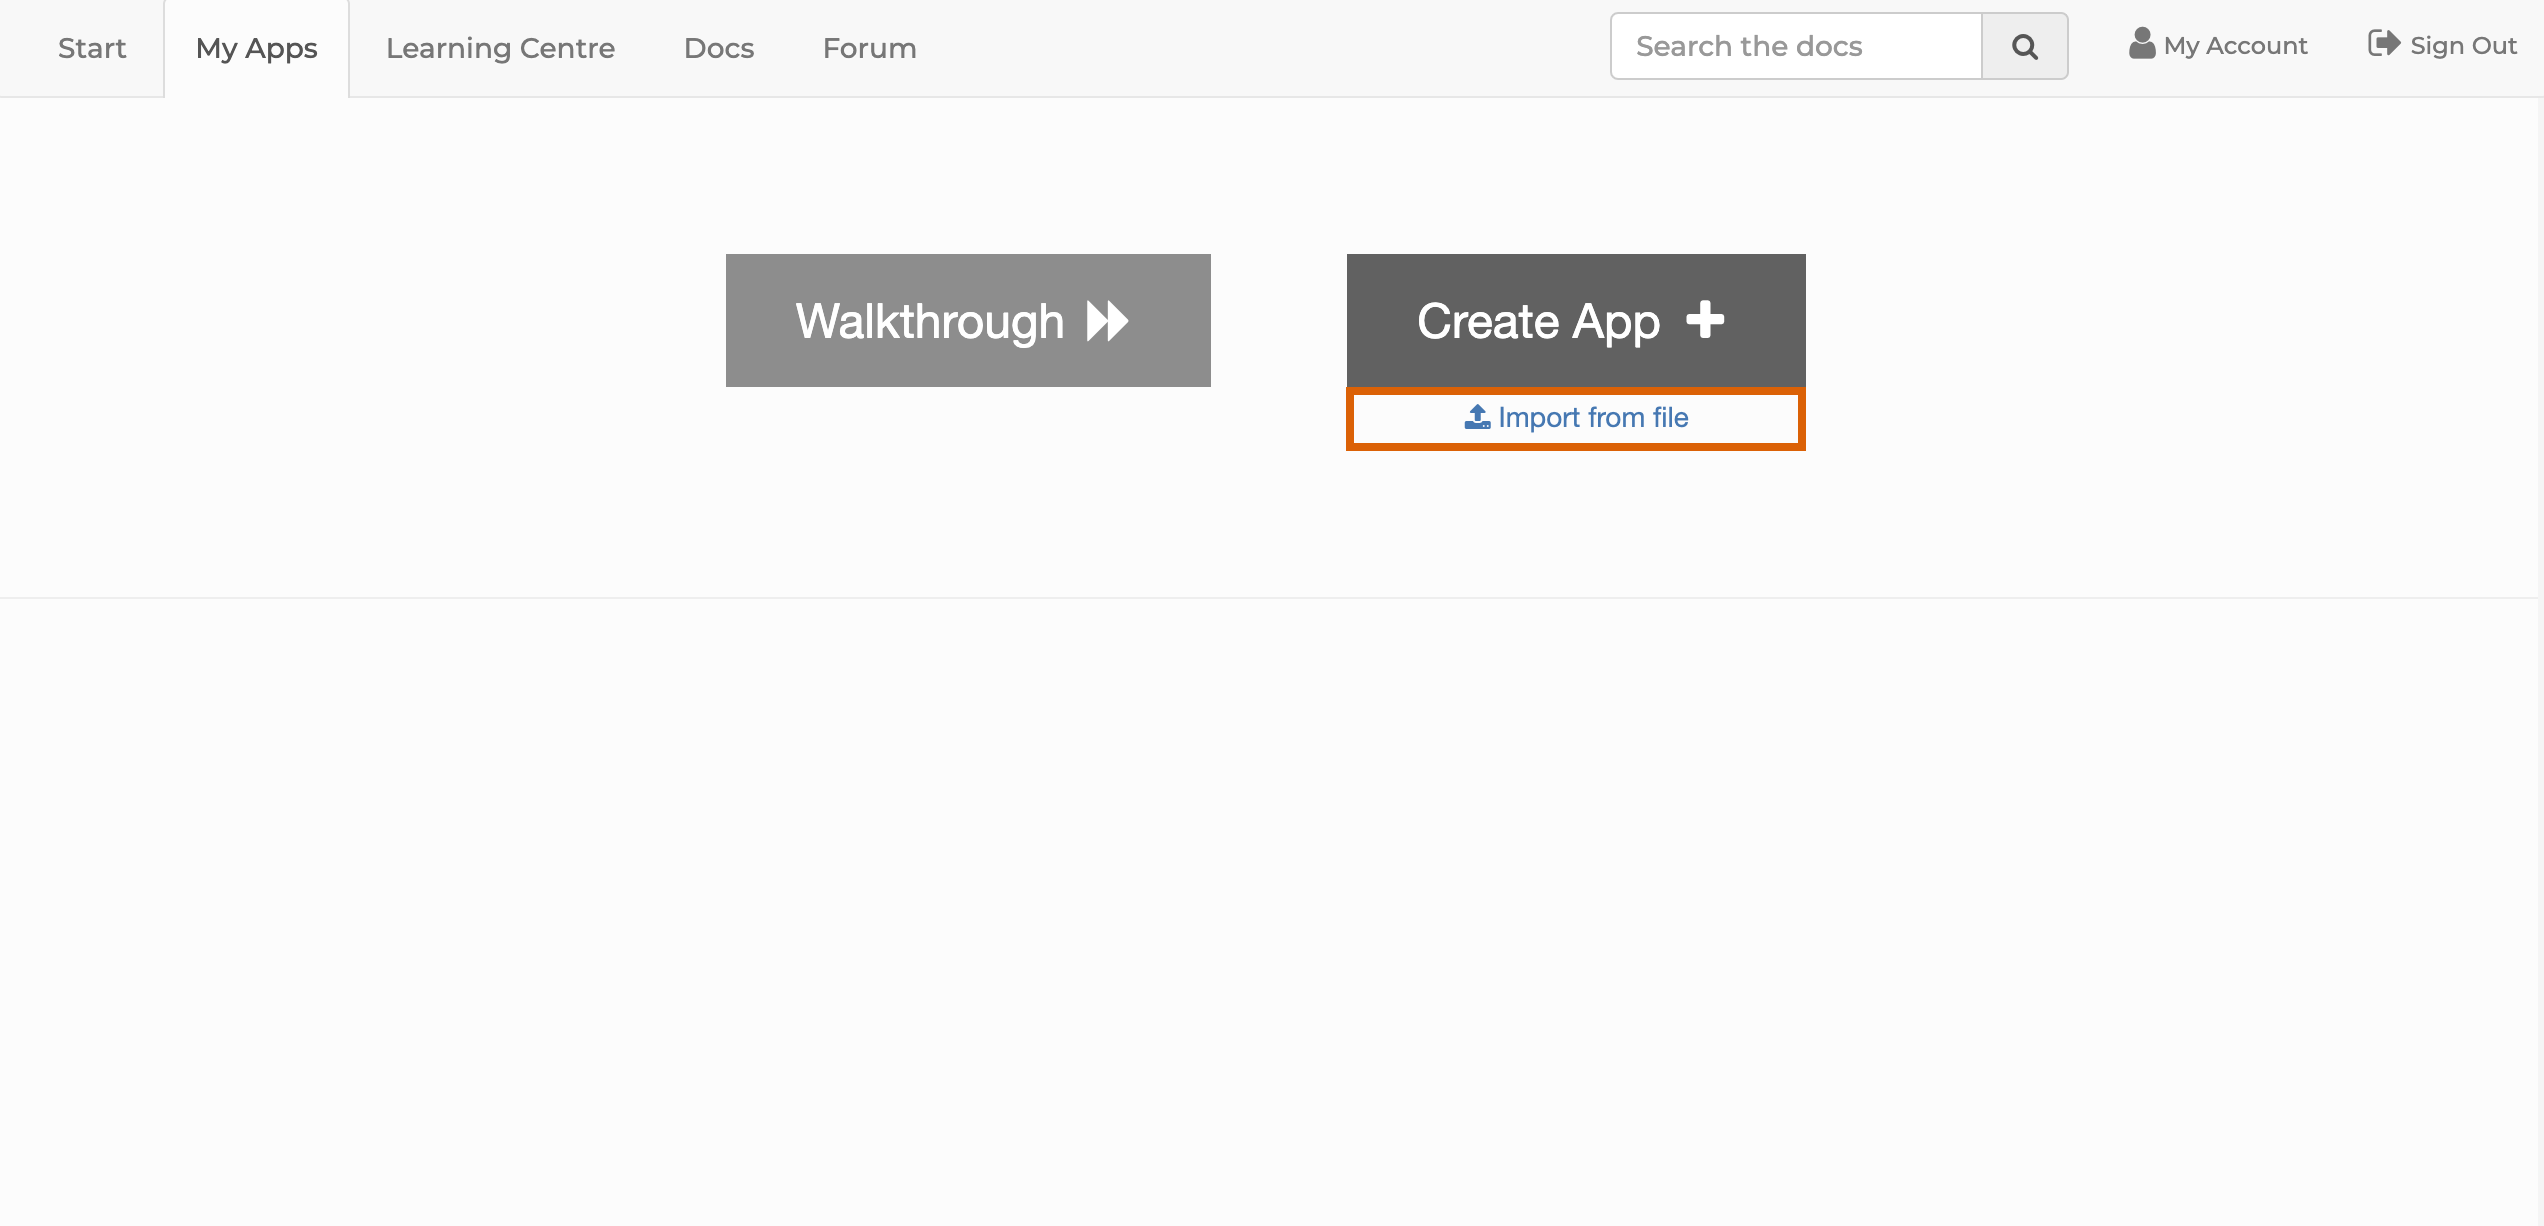
Go to your Anvil account and select My Apps via the header bar in the main menu.
From the My Apps page, click on the Import from file link:
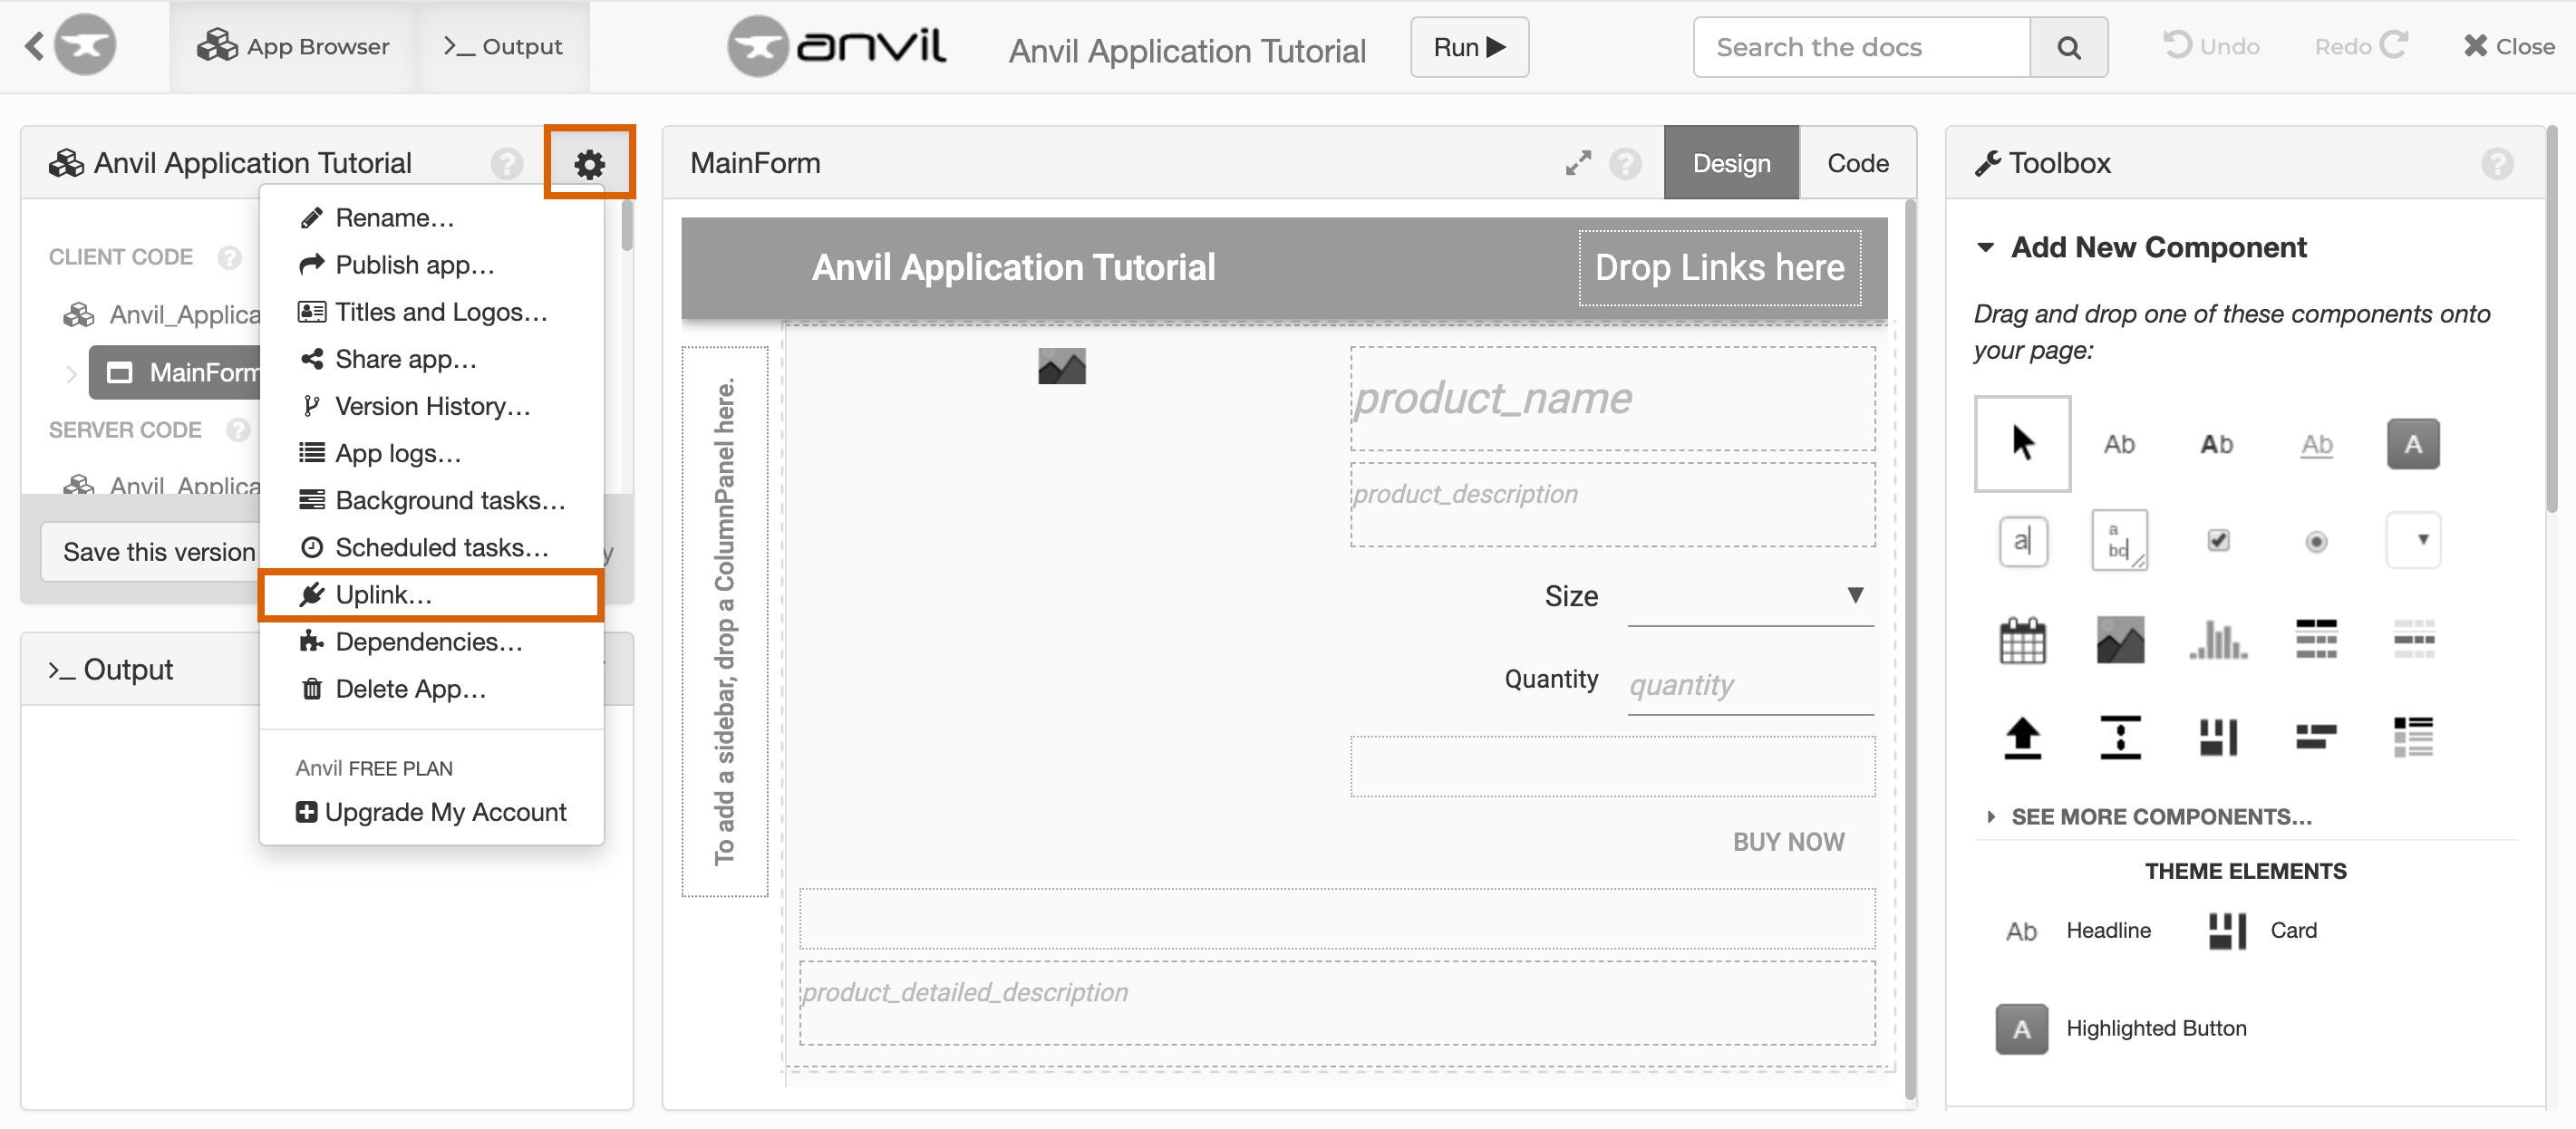
Upload your Anvil Client Application and you will be redirected to the Anvil editor. Open the settings menu on the left side bar (i.e. click on the icon) and choose the Uplink... option:
Click the Enable the Anvil Server Uplink for this app button in the Anvil Uplink dialog:
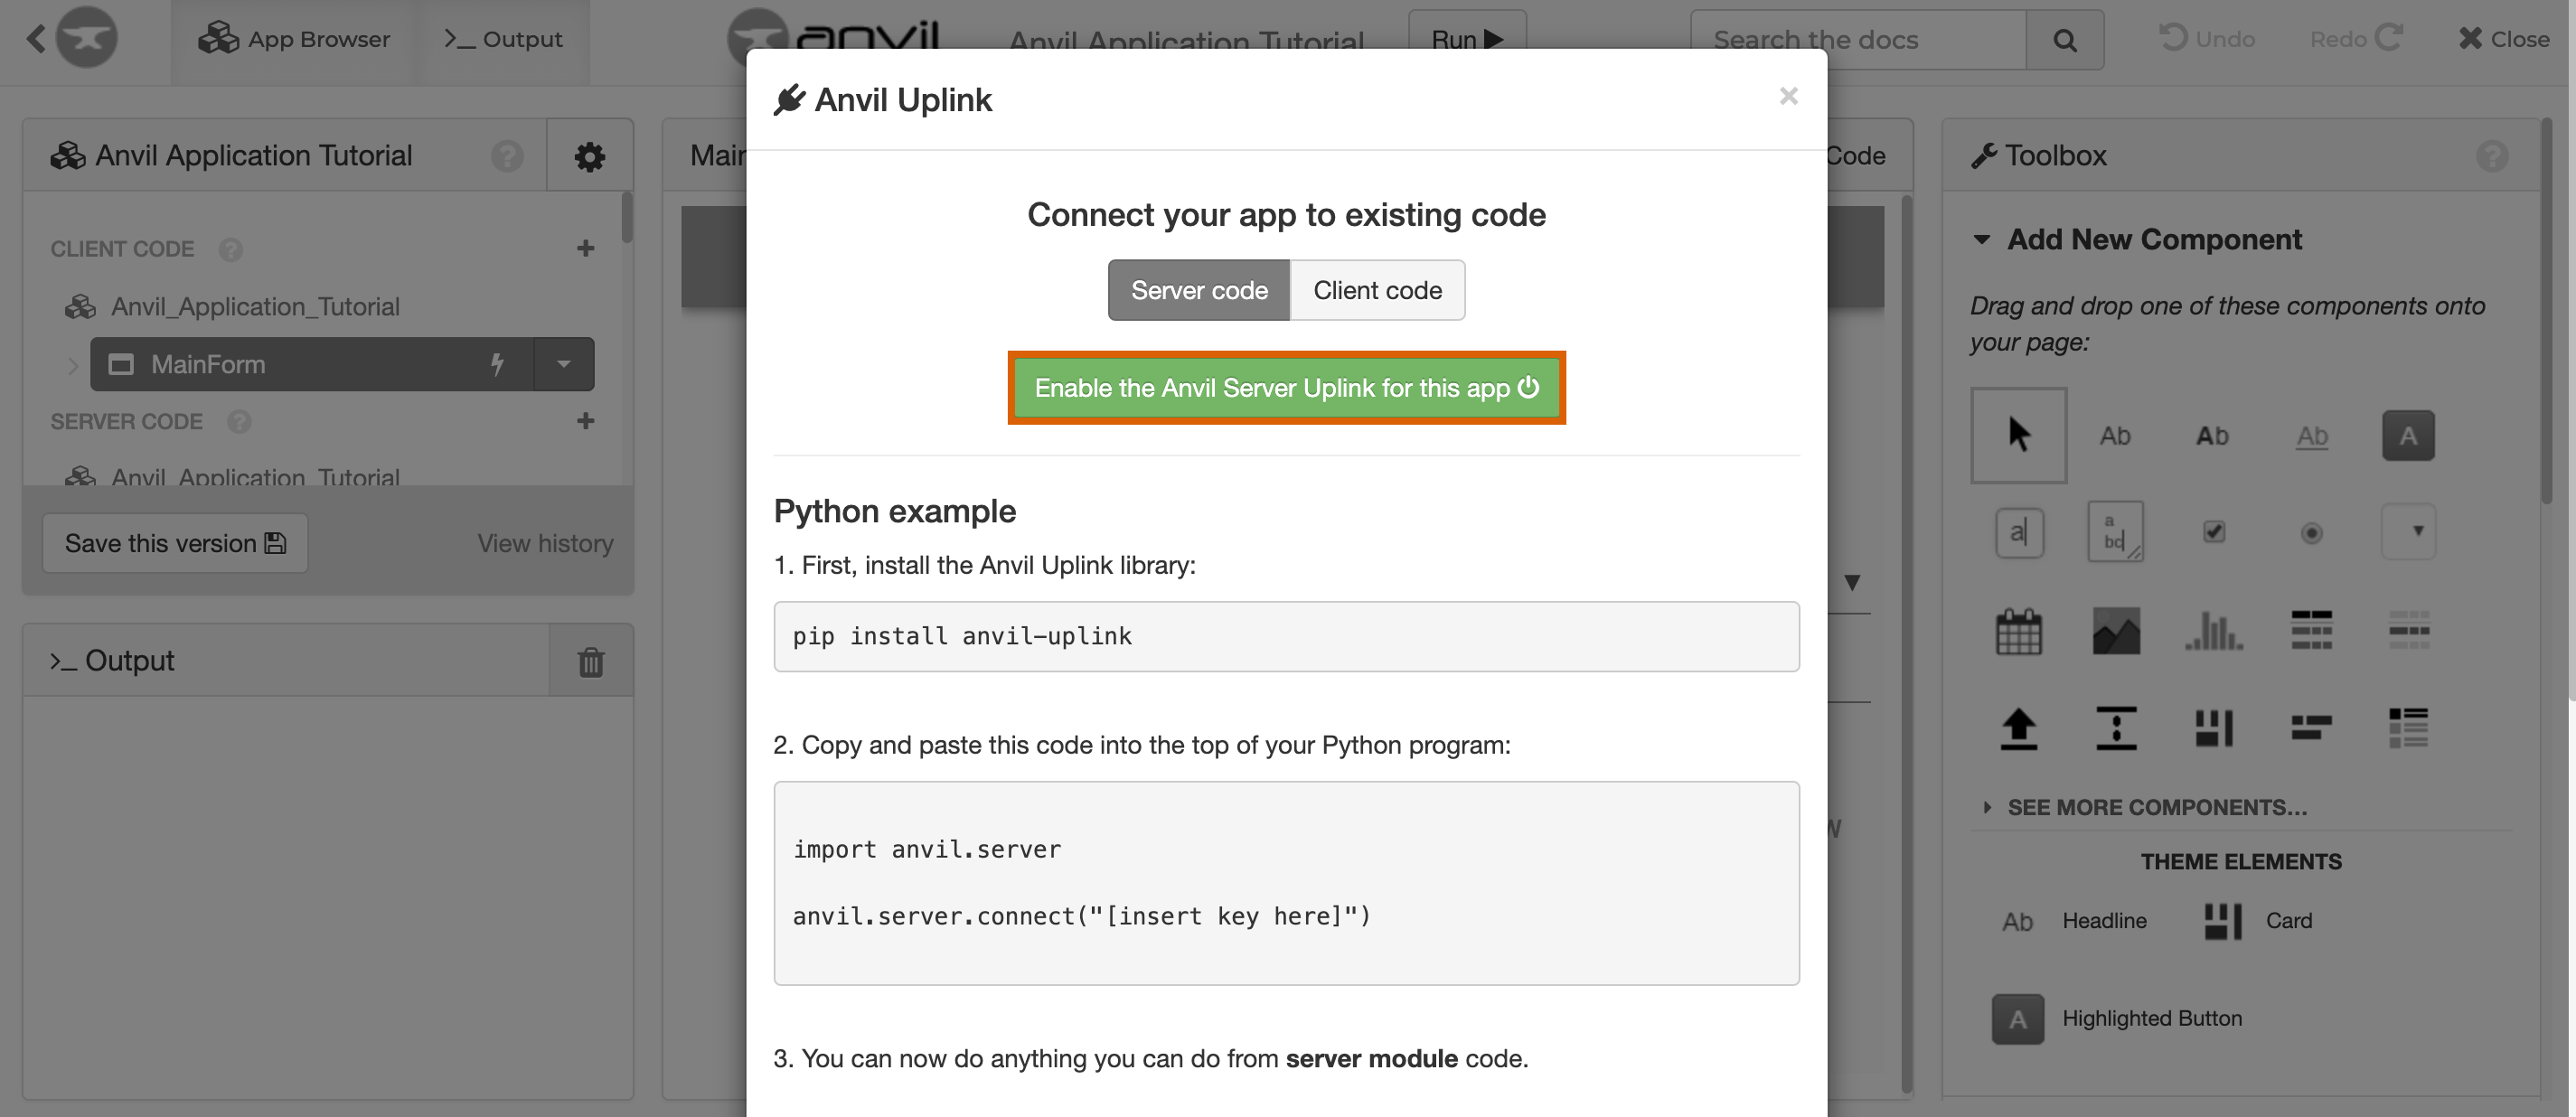
Subsequently, the system will provide your Uplink key.
Tip
Make sure to copy your uplink key since it is required for the following operations.
Once your uplink key is copied and saved, close the Anvil Uplink dialog
Next, proceed Main Form editor and click on the Code button.
Locate the PRODUCT_ID constant and provide your t-shirt product ID value to this constant.
Create a hub integration extension
Use the Connect UI to create a new Hub Integration extension and copy its environment identifier.
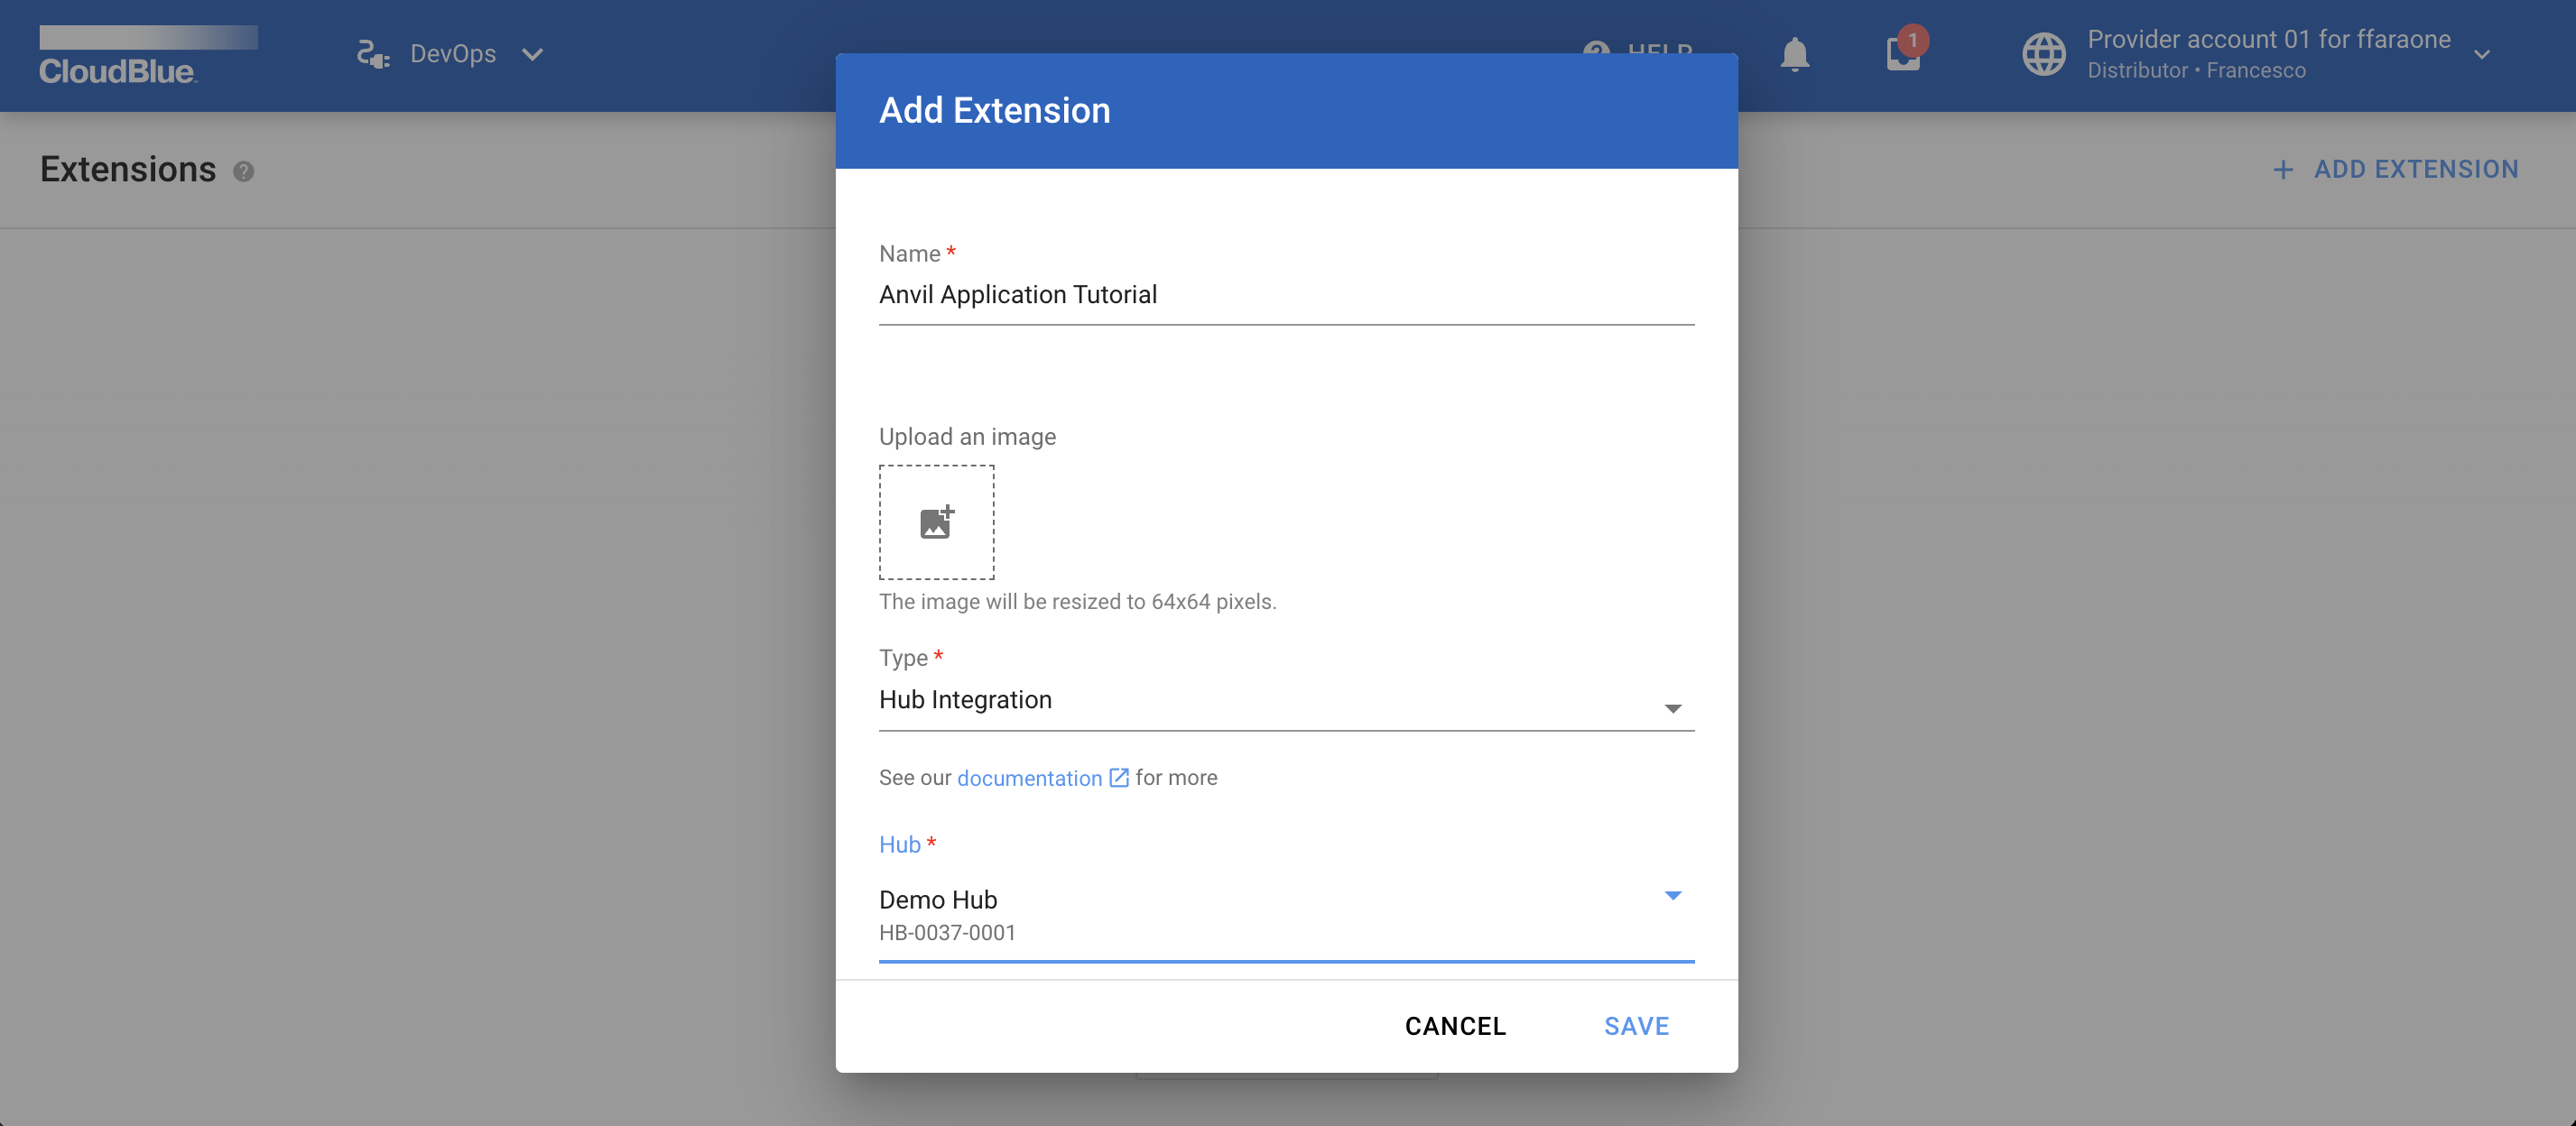
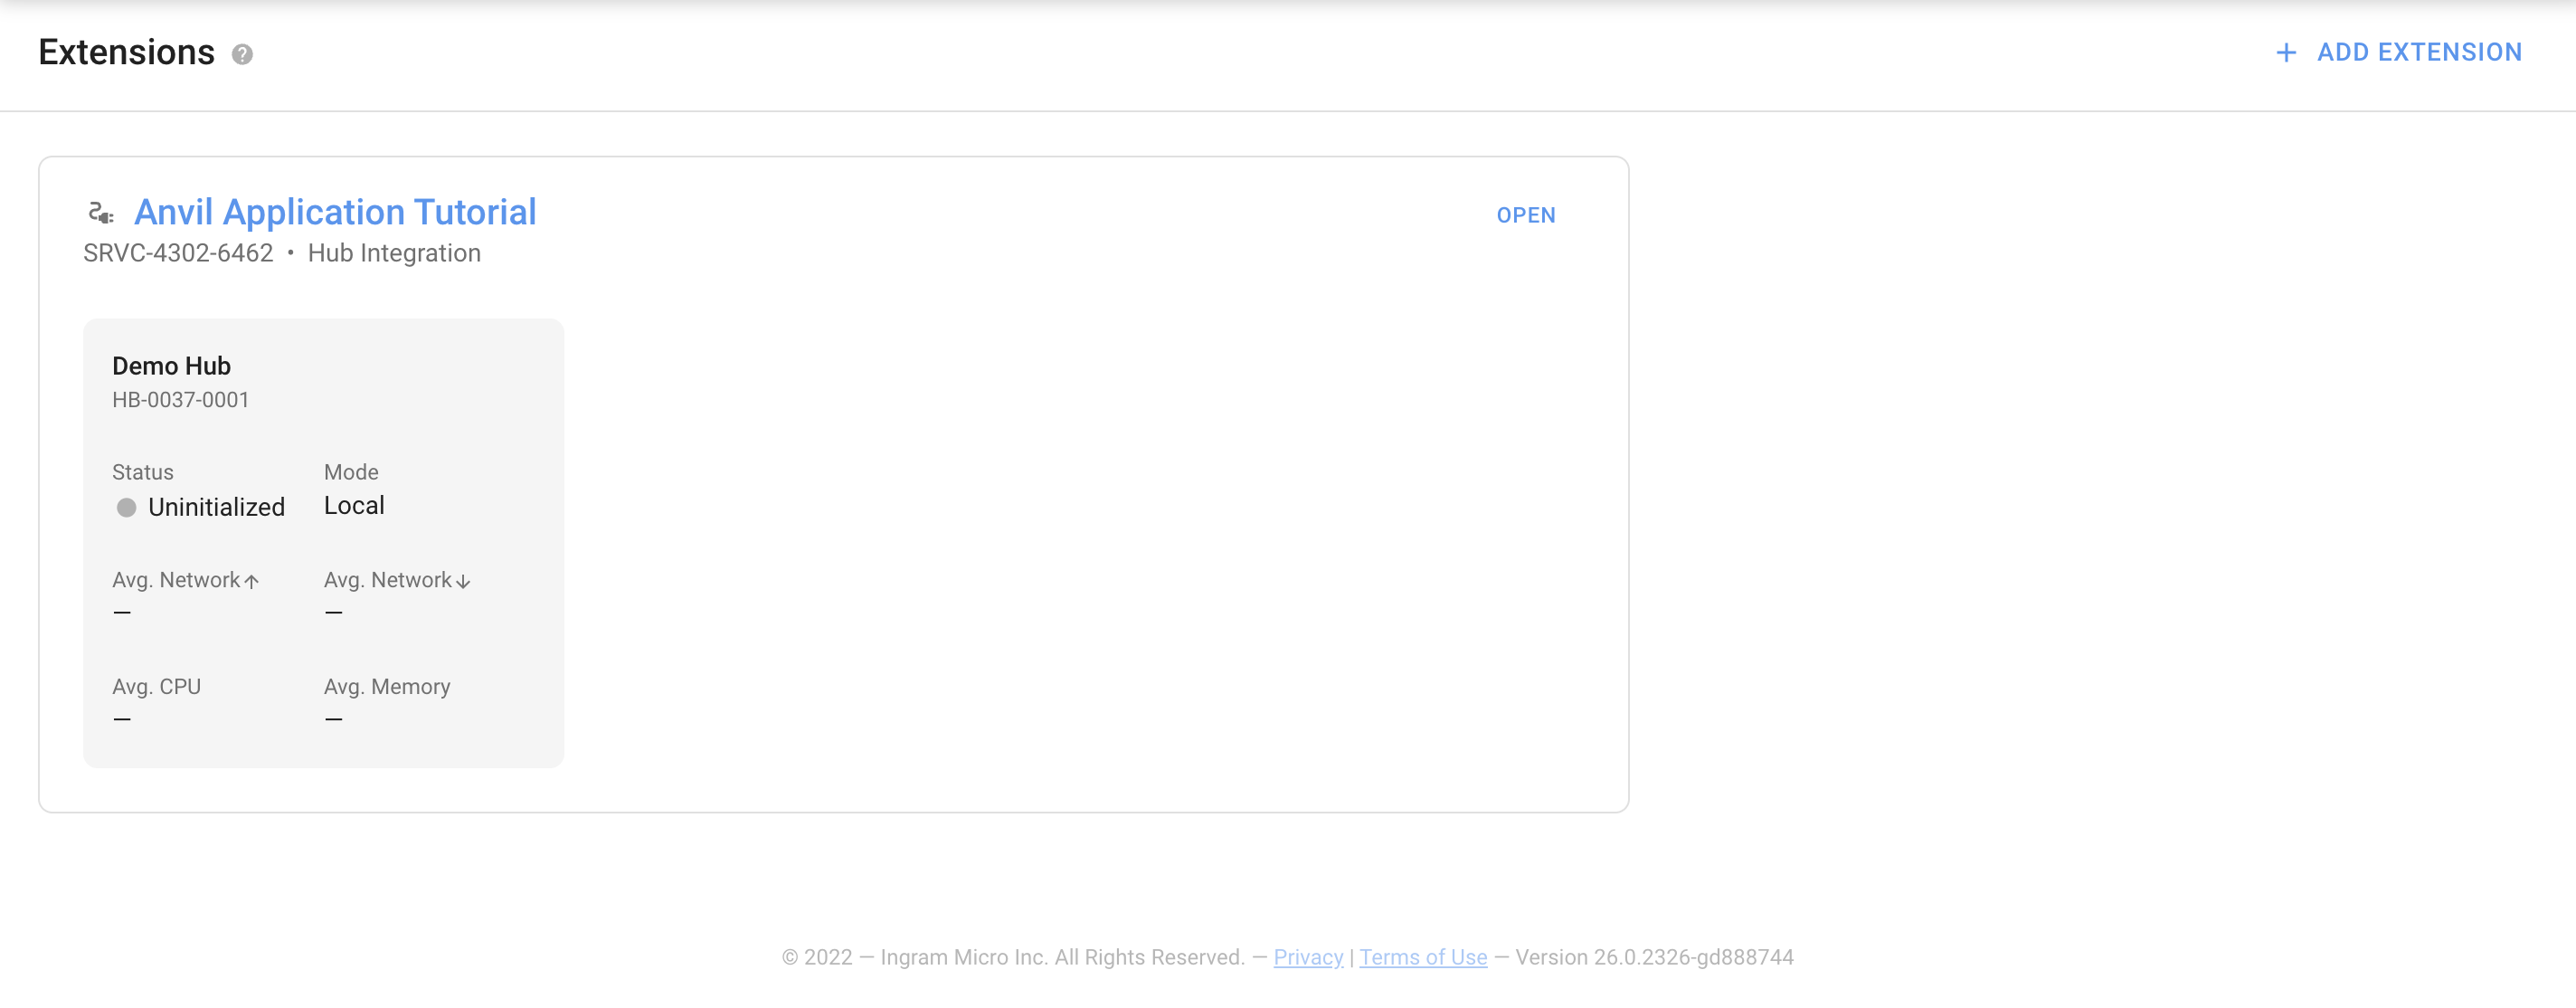
Sign into your distributor account and navigate to the DevOps module. Start creating a new extension by clicking the Add Extension button.
Select the Hub Integration type and specify your hub that is associated with your configured marketplace and your configured t-shirt product:
Once your extension object is created, access the extension details screen by clicking on its name:
Switch to the DEV environment tab that will be used for the following tests:
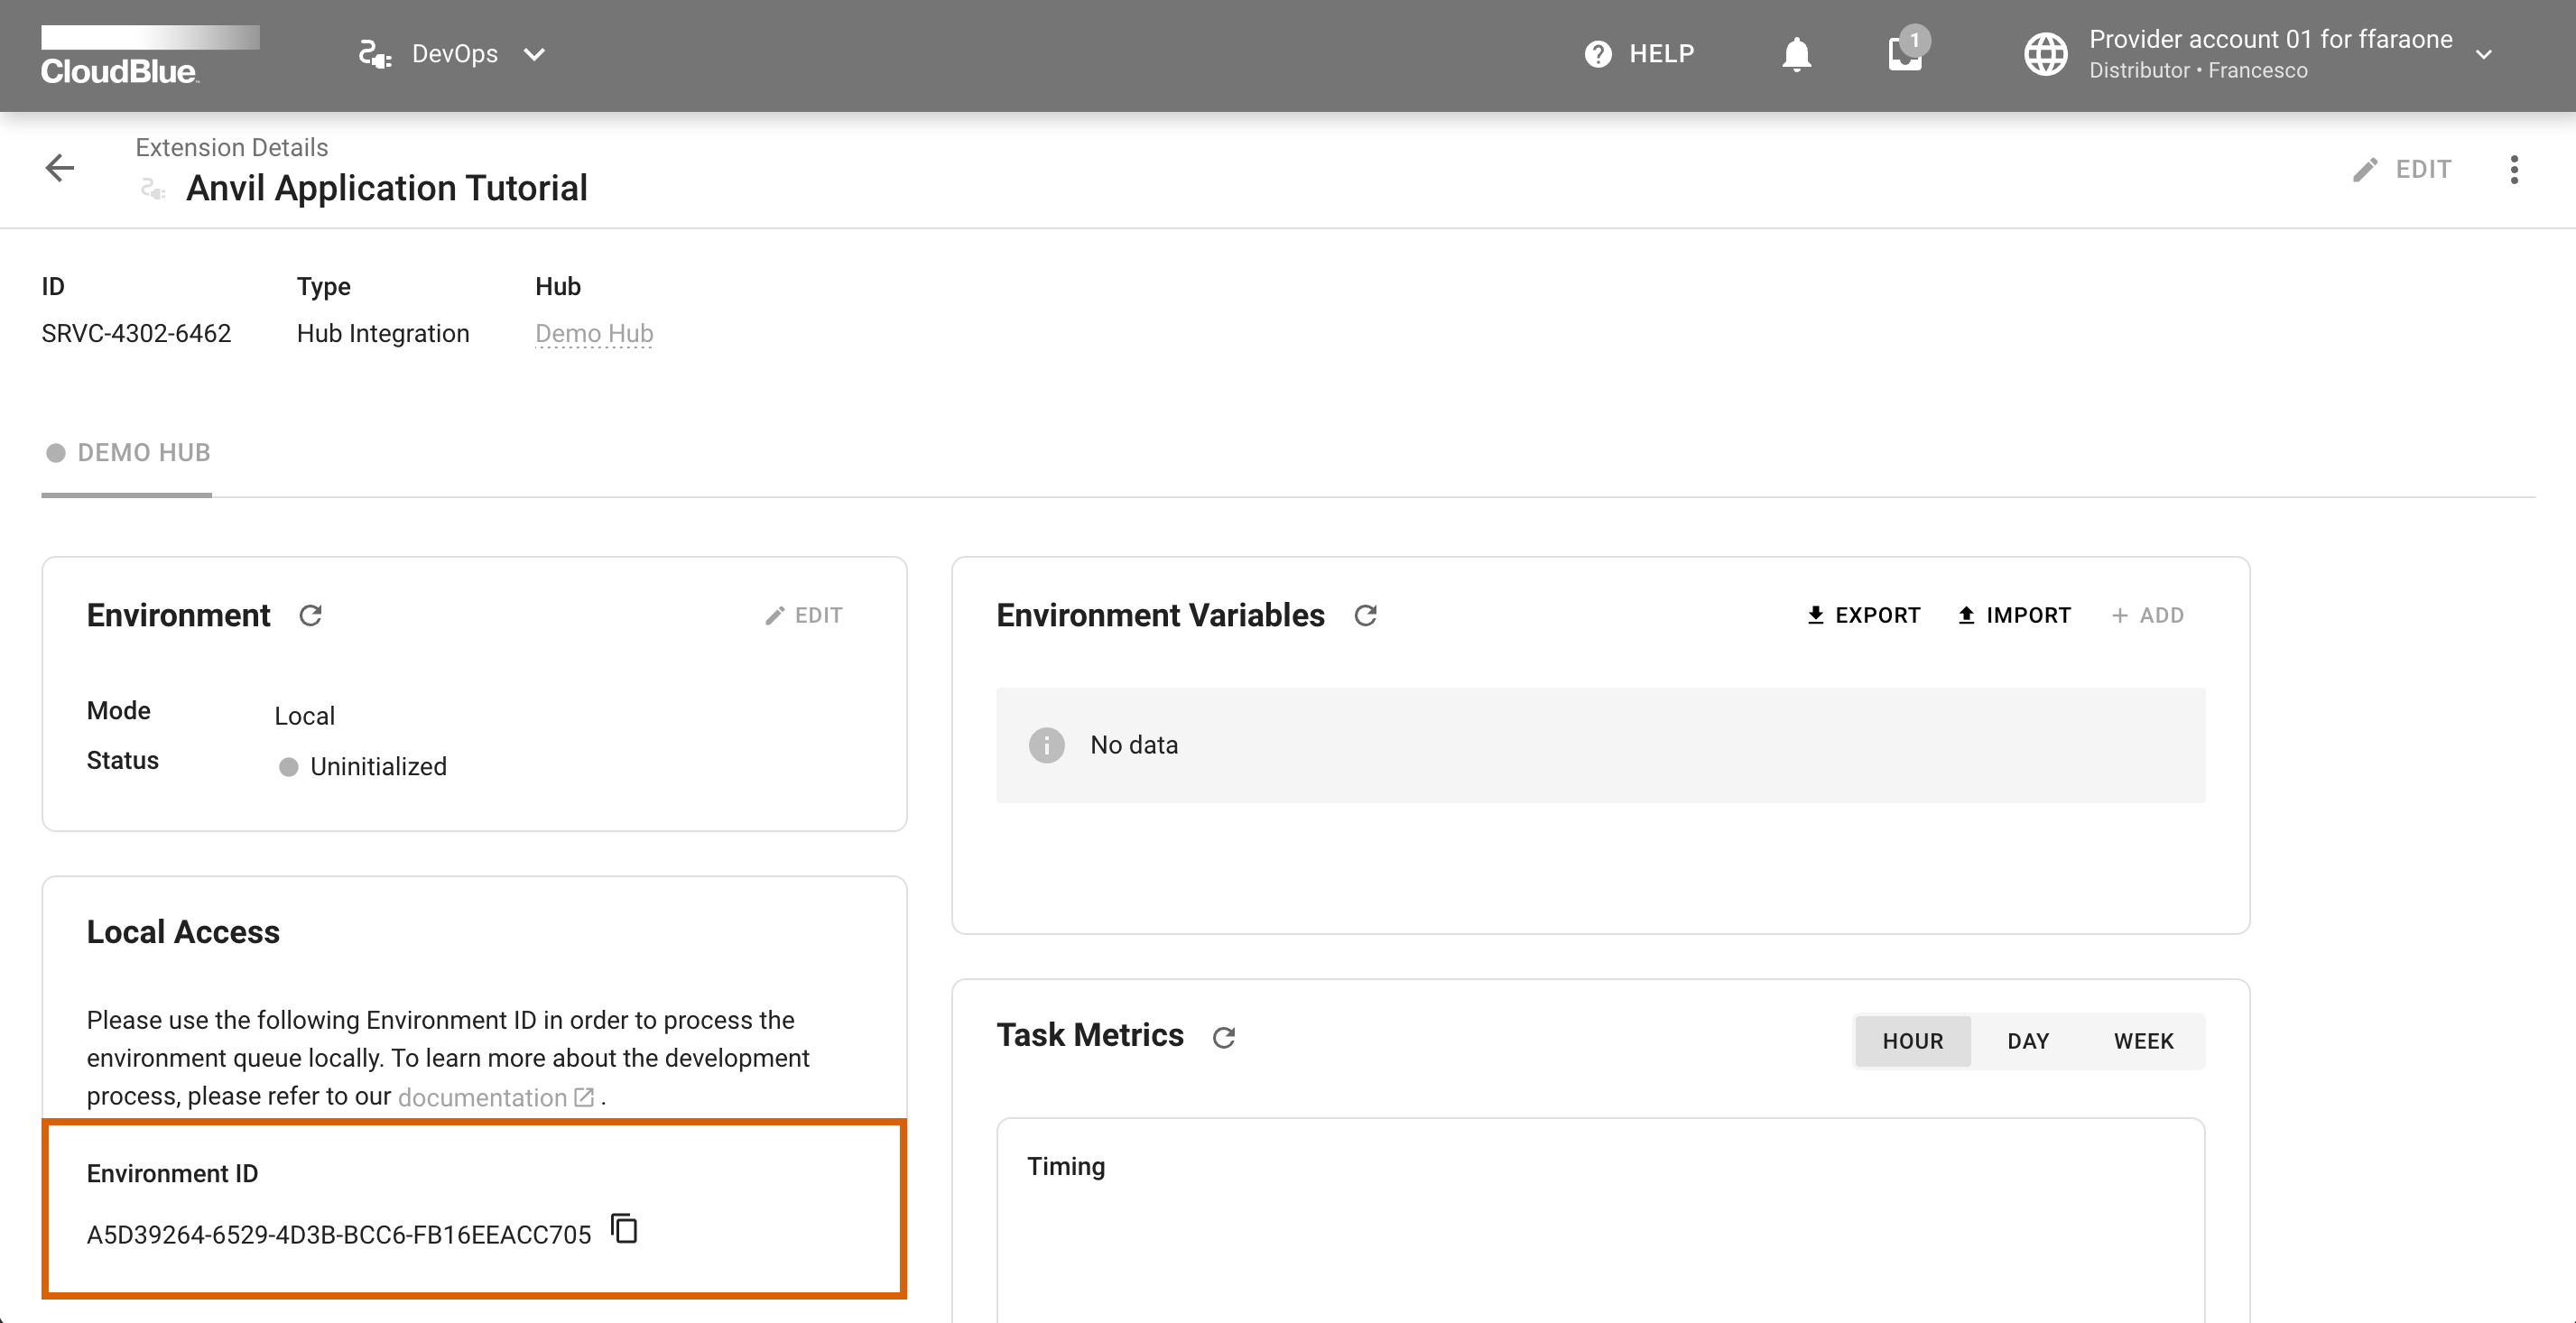
Locate the Local Access widget and click on the button to copy your environment ID.
Update your environment file
Edit your .tshirt_dev.env file and provide the ENVIRONMENT_ID variable with your copied value.
Furthermore, make sure that your API_KEY is assigned to your created API token.
Note
Note that your created API key should also include all required module permissions. For more information on how to create an API Key, refer to the Community Portal.
Build a Docker Image
Use the following bash command to build a docker image for your extension:
$ docker compose build
Run your extension
Once your docker image is composed, execute the following command to run your container:
$ docker compose up tshirt_dev
DEV environment by
using the button located in the Environment widget.
Note that the provided Environment Variables widget should have assigned values for each of the configured variables demonstrated in this tutorial. Confirm your assigned variables by clicking the Apply Changes button.
Create an order from your Anvil Client Application
Go to the Anvil application editor and click the Run button via in the header bar.
Once your application is loaded, choose a size for a t-shirt by using the size dropdown menu.
Provide an integer value for quantity and then press the Buy Now button.
As a result, a new purchase request should be generated on the CloudBlue Connect platform.
Congratulations
 Your configured
 Anvil Application works like a charm 