Test
Once your Events Application is created, it is required to configure a product, define your extension on Connect, and prepare a docker image for the following tests.
Configure your product
Create a product on the Connect platform that will be used for the following tests.
Note
In case you are not familiar with the Products module on Connect, use the documentation that is provided on the Connect
Community Portal.
- Sign into your
vendoraccount and create a t-shirt product via the Connect UI. - Go to the Product Parameters tab and remove the default parameters.
- Add a new
choiceproduct parameter, assign theorderingphase and select thesubscriptionscope. - Add the following choices to your list:
- label
XSvaluexs - label
Svalues - label
Mvaluem - label
Lvaluel - label
XLvaluexl
- label
- Set the parameter ID to
size. - Go to the product settings and enable the
draft validationcapability for your subscription purchase requests.
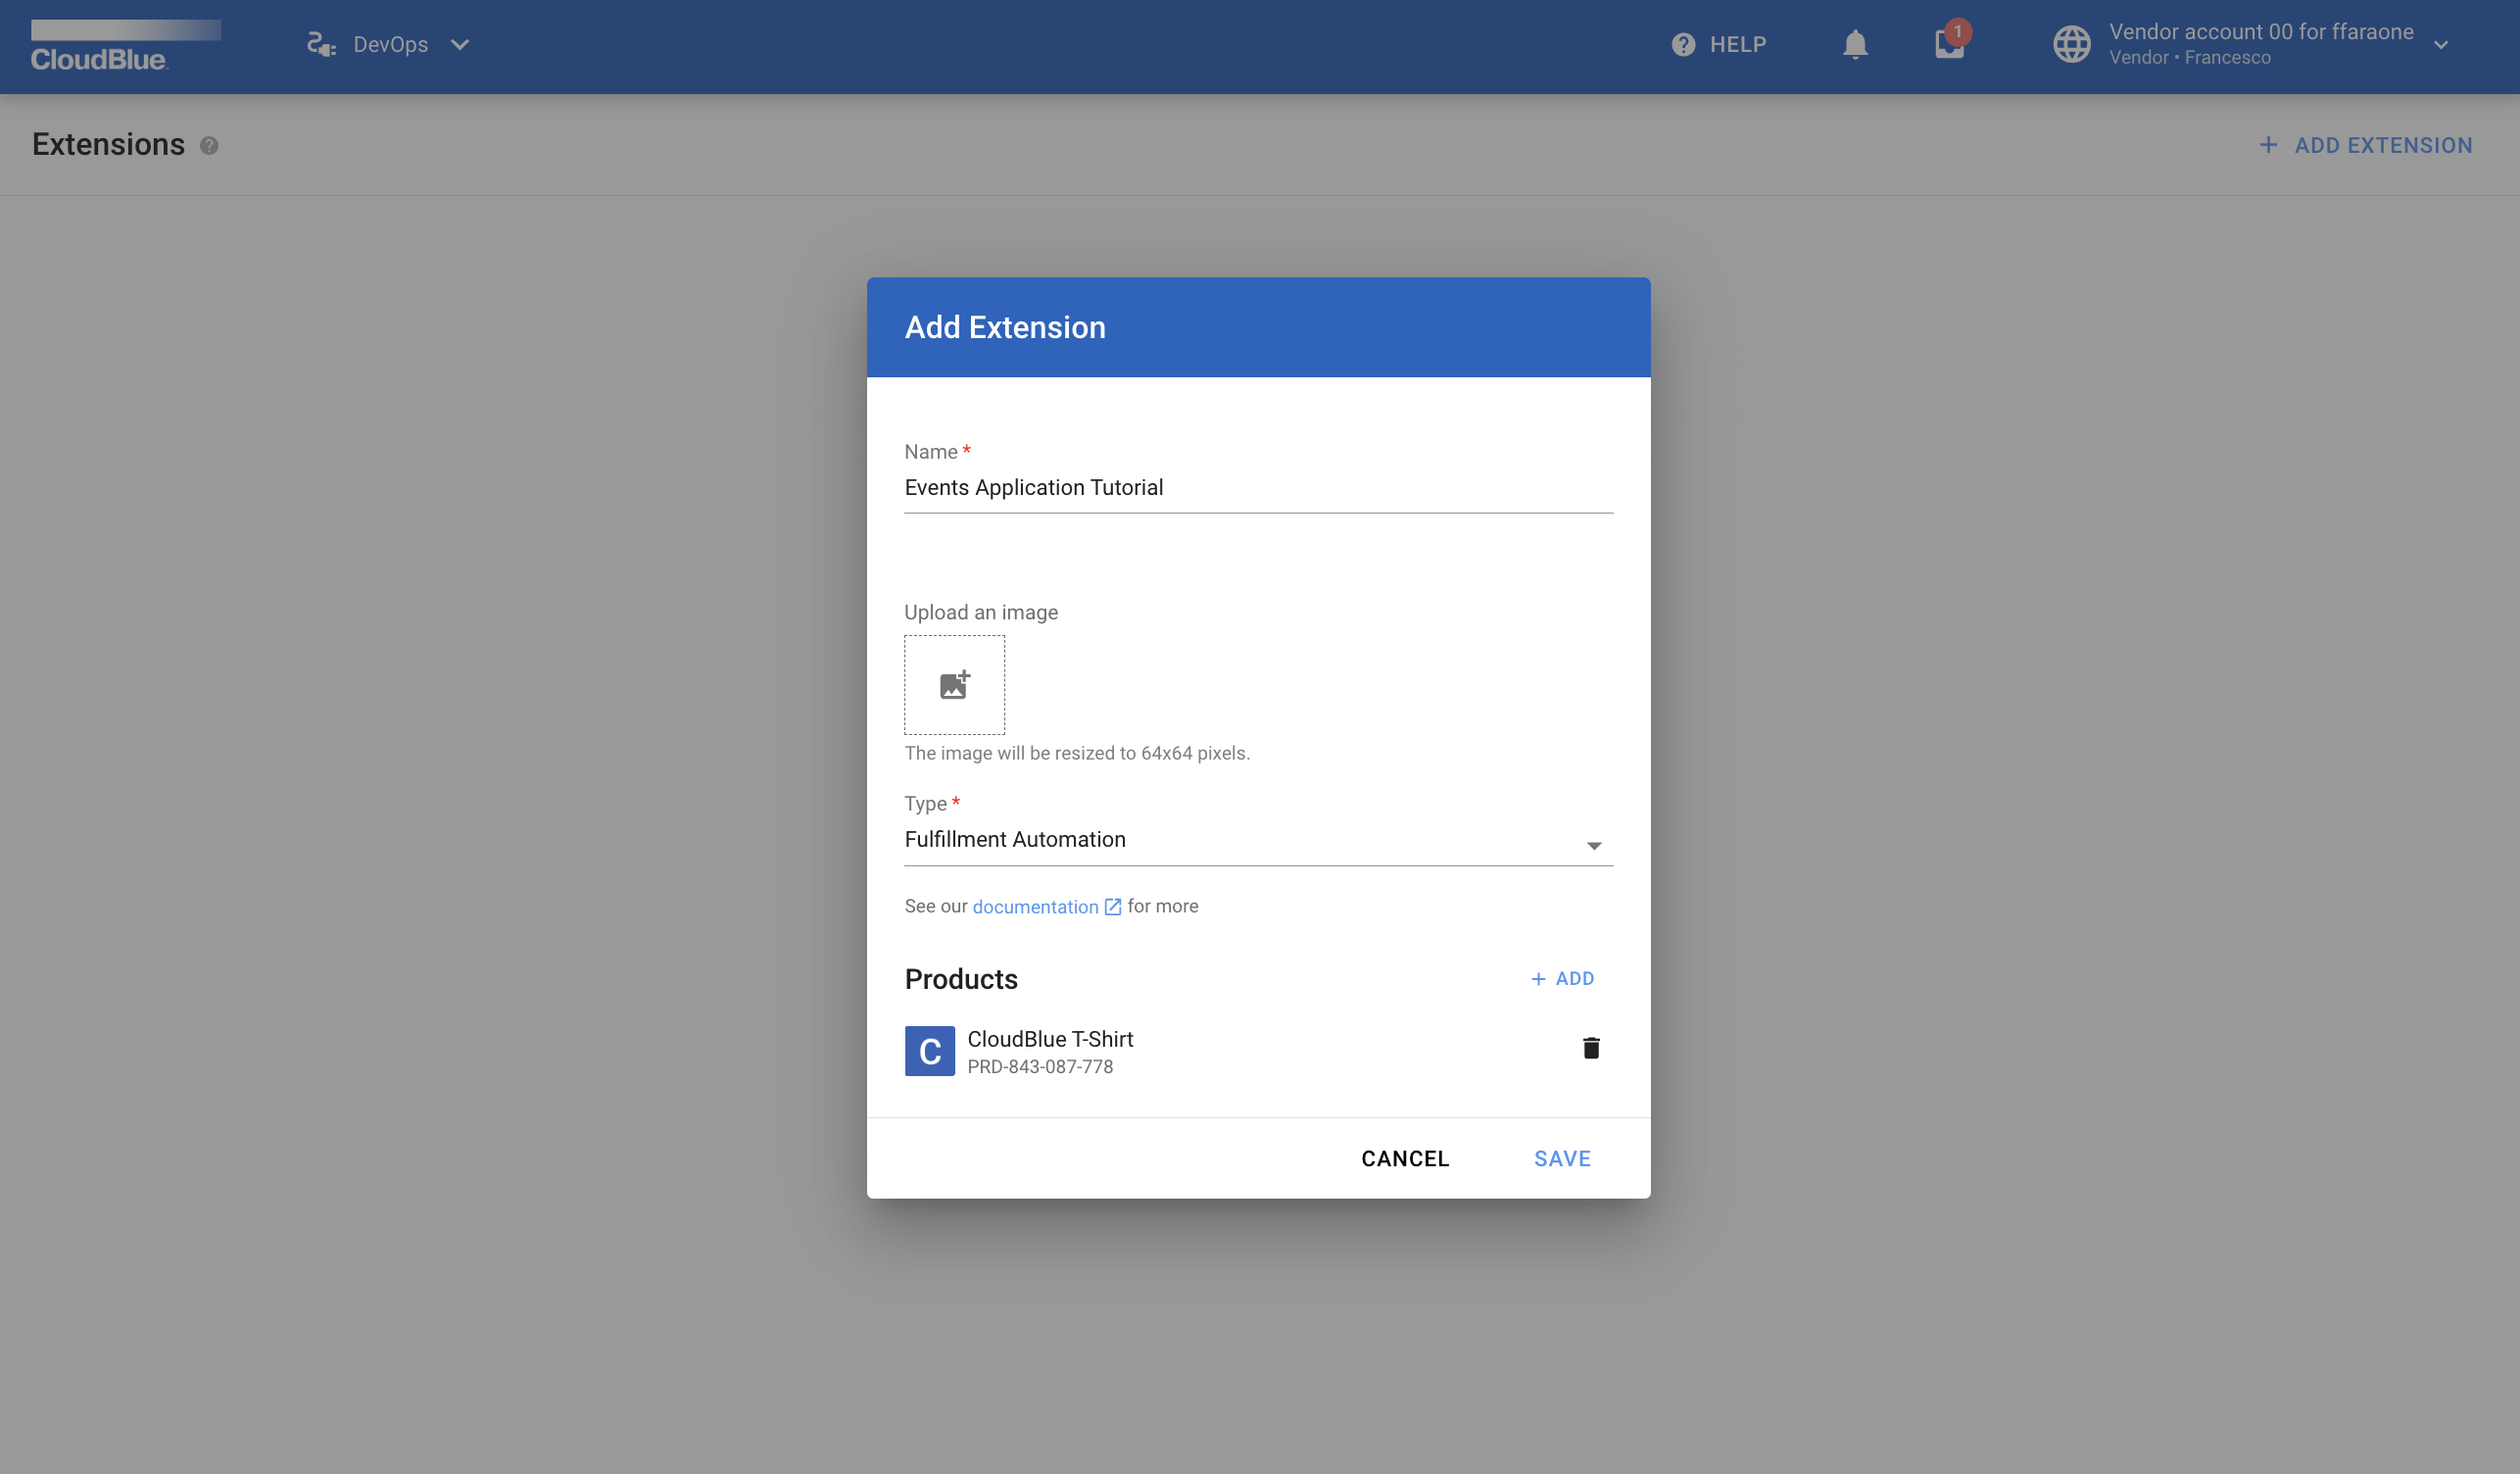
Create a fulfillment automation extension
Use the Connect UI to create a new Fulfillment Automation extension and copy its environment identifier:
Navigate to the DevOps module and click the Add Extension button.
Select the Fulfillment Automation type and specify your configured product:
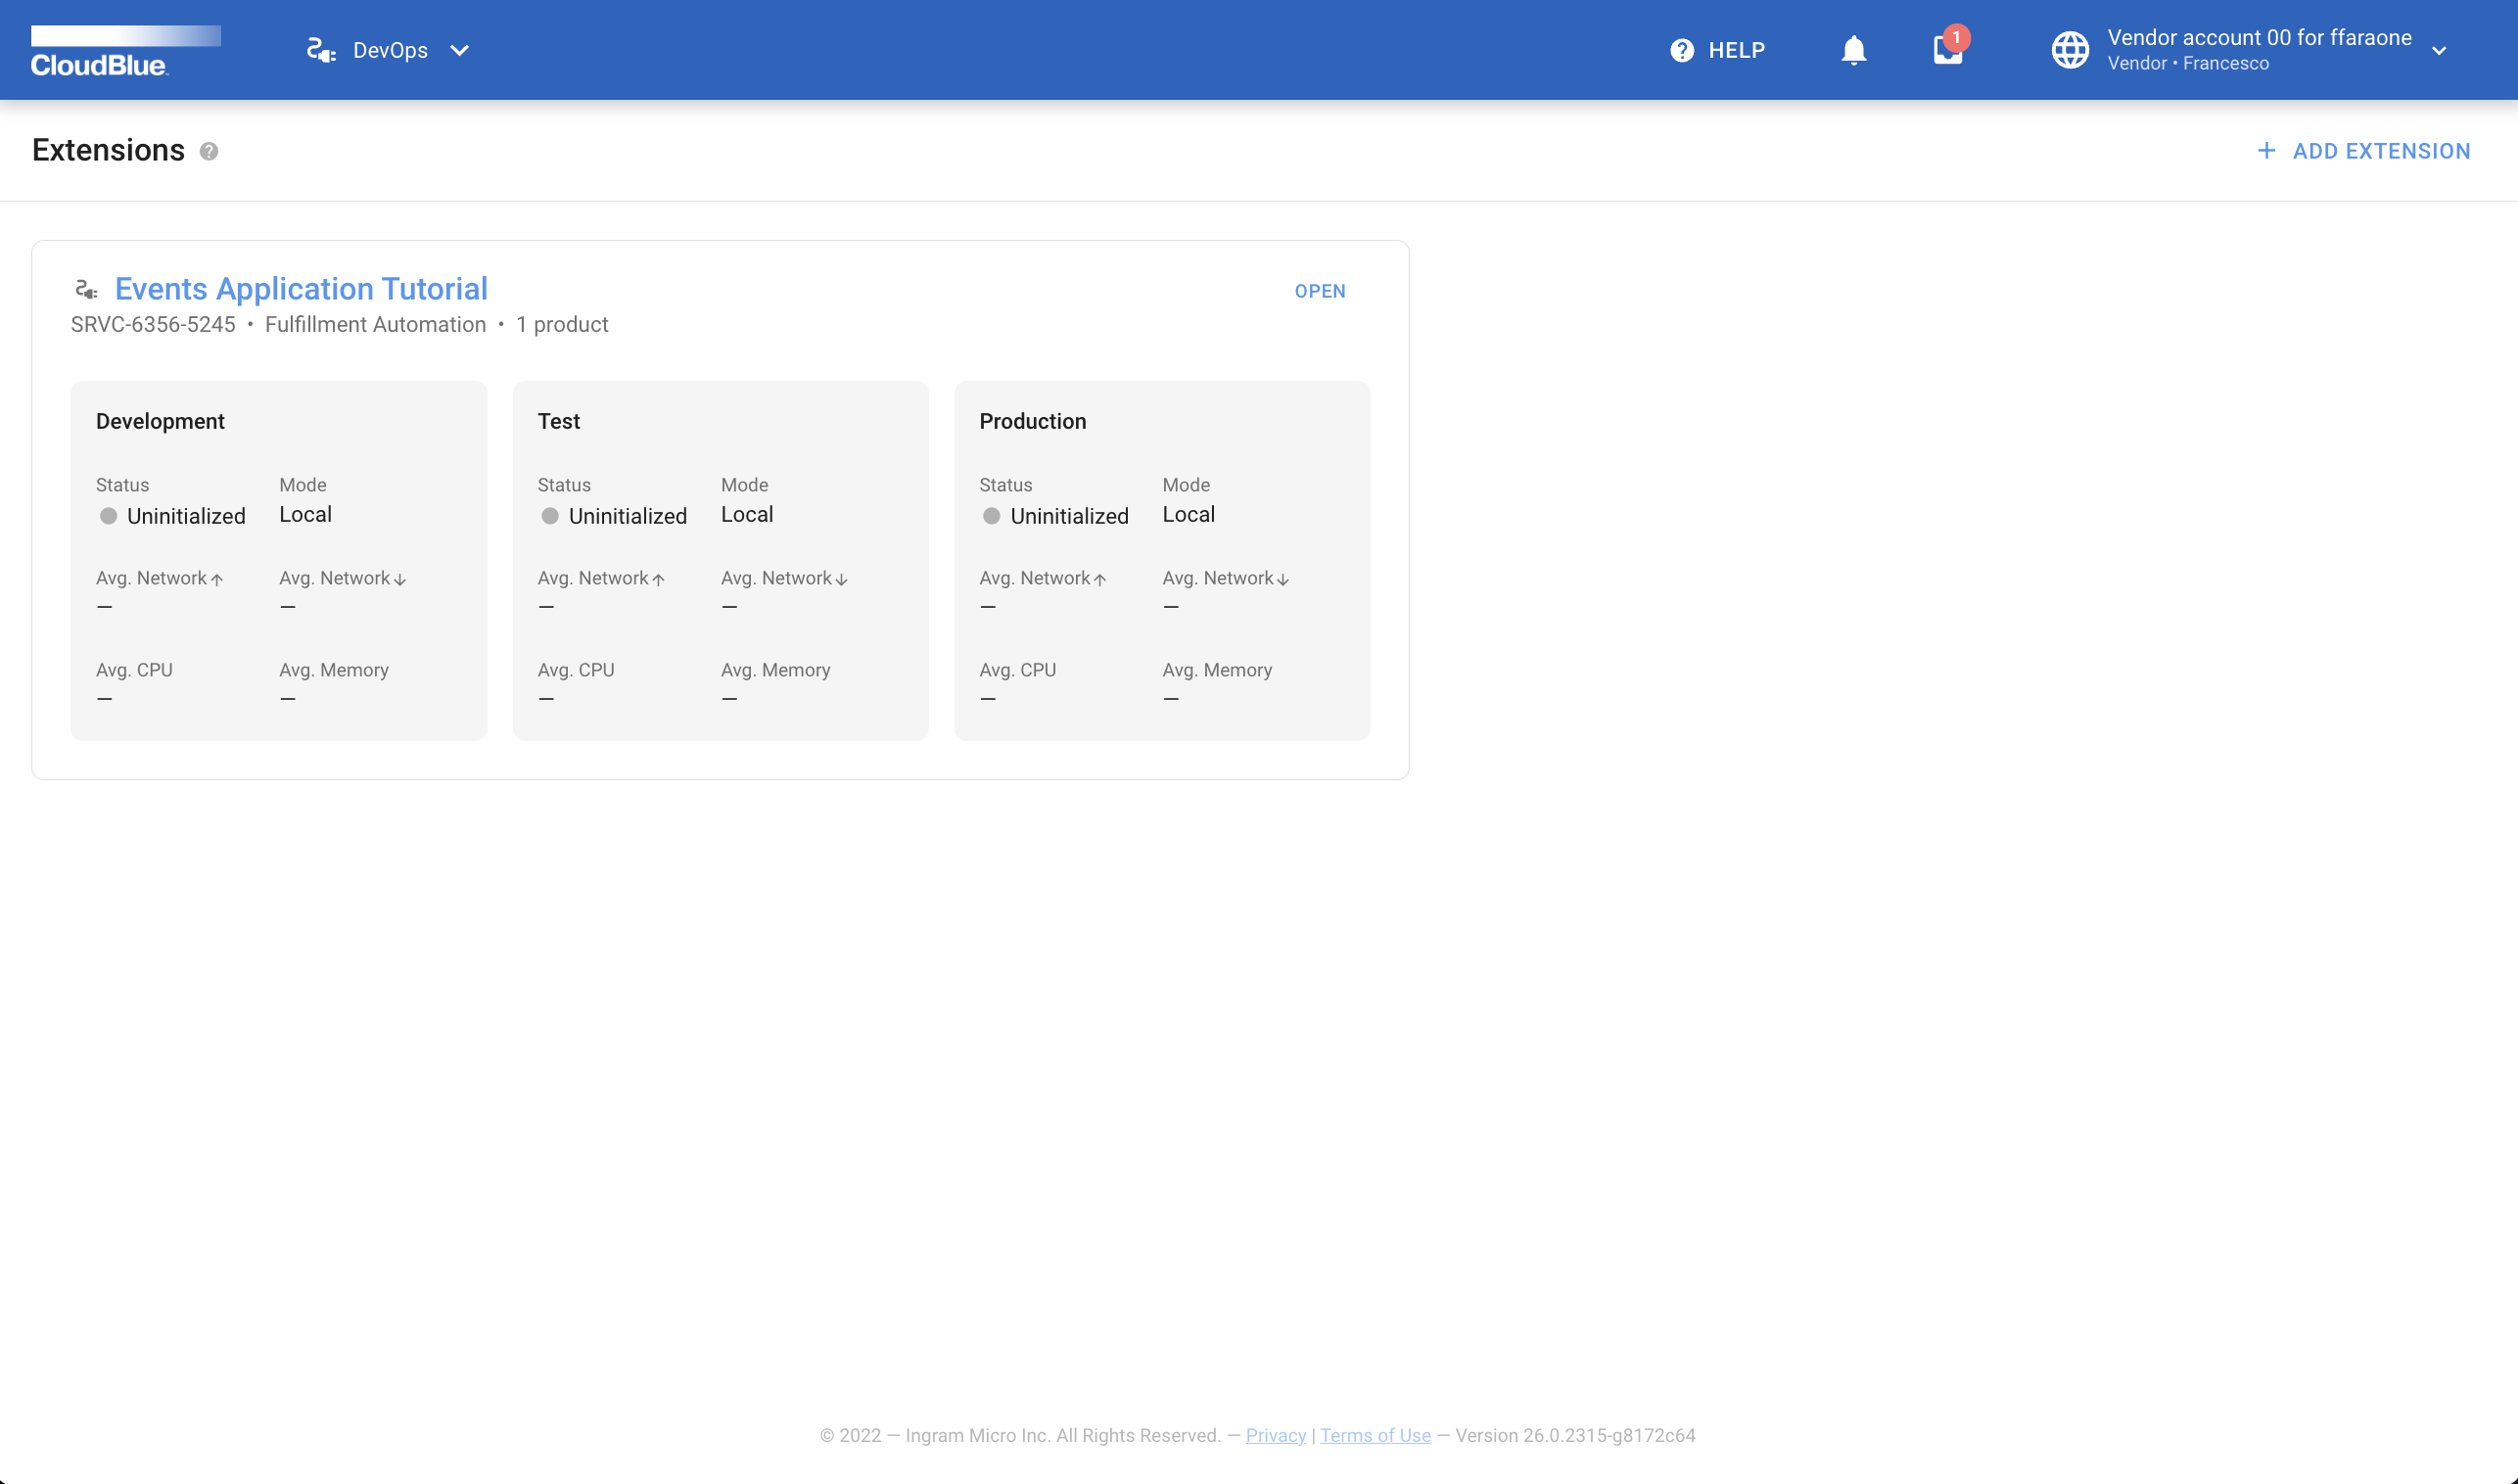
Once your extension object is created, access the extension details screen by clicking on its name:
Switch to the DEV environment tab that will be used for the following tests:
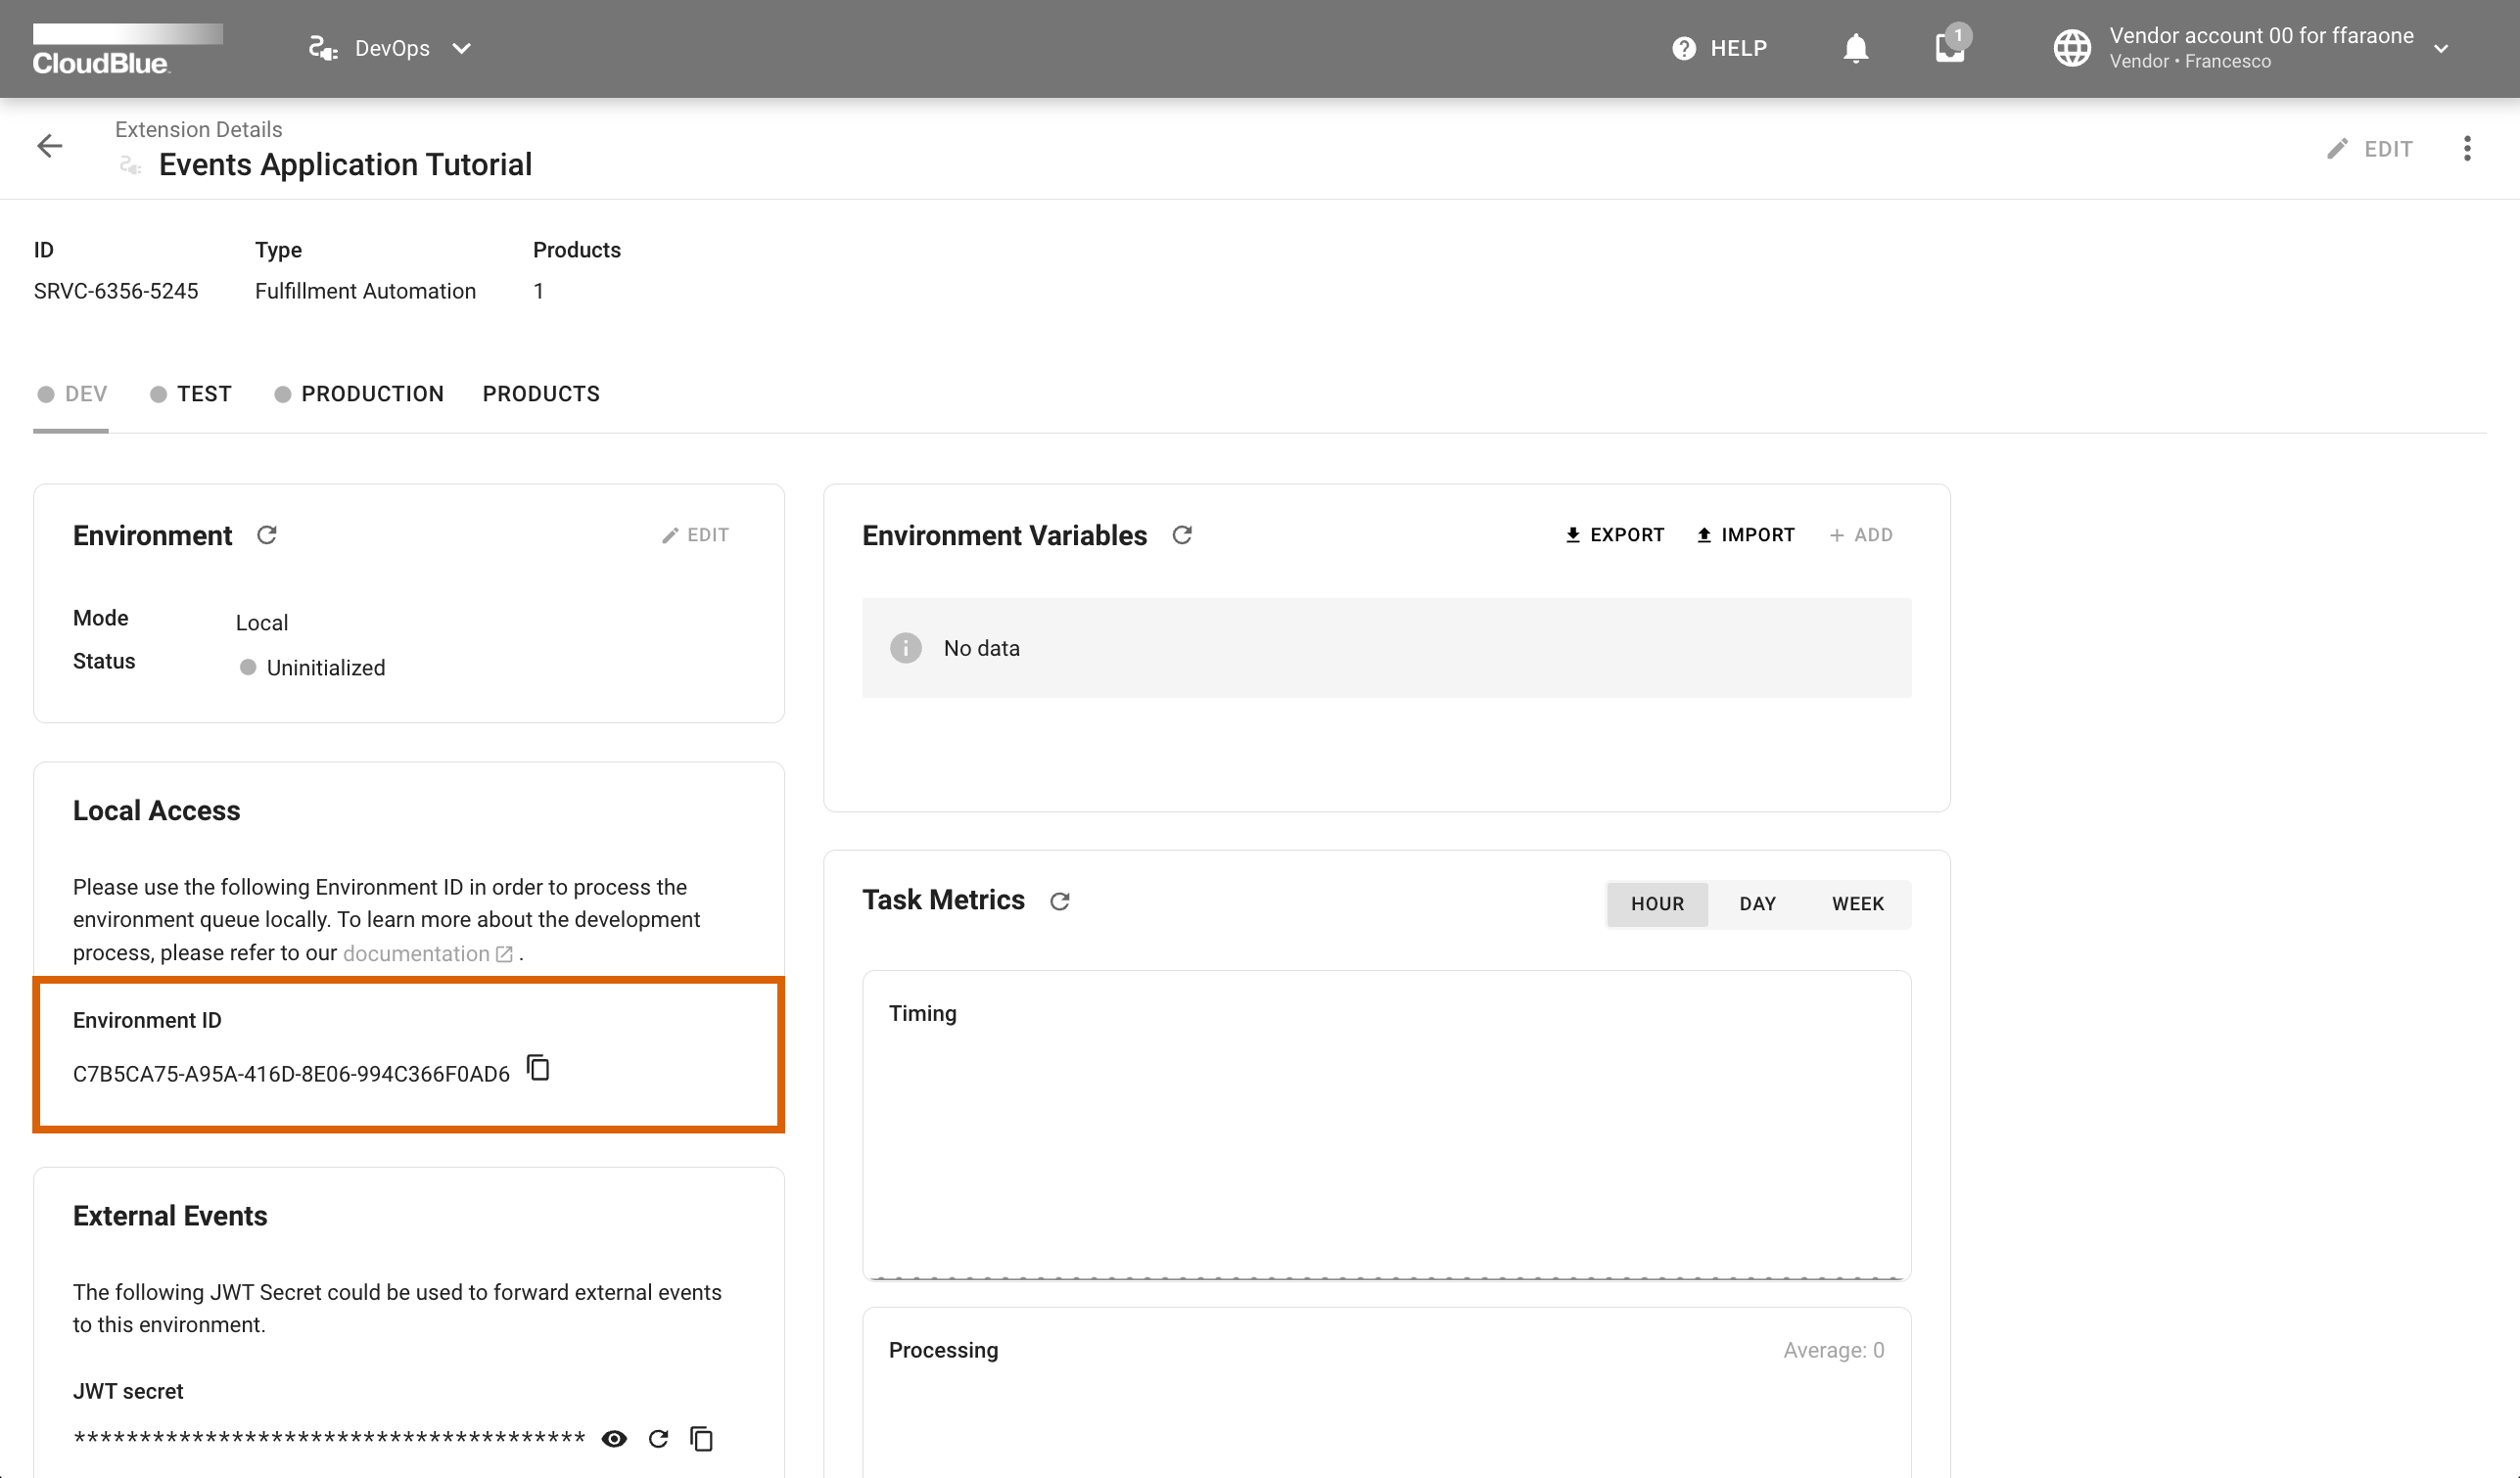
Locate the Local Access widget and click on the button to copy your environment ID.
Update your environment file
Edit your .tshirt_dev.env file and provide the ENVIRONMENT_ID variable with your copied value.
Make sure that your API_KEY is assigned to your created API token on the Vendor account that includes your configured product.
Note
Note that your created API key should also include all required module permissions. For more information on how to create an API Key, refer to the Community Portal.
Build a Docker Image
Use the following bash command to build a docker image for your extension:
$ docker compose build
Run your extension
Once your docker image is composed, execute the following command to run your container:
$ docker compose up tshiert_dev
Next, go to the Connect UI and check whether your extension is connected to the DEV environment by
using the button located in the Environment widget.
Create a preview subscription
When your extension is deployed, create a new preview subscription by using the Subscriptions module or via
the Preview tab within your product profile page.
Consequently, your selected t-shirt size should be validatied by your deployed extension. In case your selected size is out of stock, you should receive an error during the request validation. If your selected size is available, your new purchase request should be auto-approved by your extension.
Congratulations
 Your configured
 Events Application works like a charm 